Code your own Port Scanner using Python

Application Security | Test Automation
Nmap
Nmap is one of the most important Information Gathering tools used by a Penetration Tester. Nmap or network mapper is a port scanning program that finds open ports on the target host. Based on which port is open, the penetration tester can further structure their plan of attack.
Nmap is a great tool and offers more than just finding open ports. It can be used to enumerate what services are running on the open ports and in some cases, also to find the exact version of the service running on that port. It also has some more advanced features like NSE(Nmap Scripting Engine) or the flags that it offers as commands, but its most important utility is the port scanning functionality.
Today, we will code a simple Nmap like port scanner using Python that will tell us which ports on a given host are open.
Imports
We will start with importing the modules we need to build our simple port scanner.
First, we need the socket module. We will use its functions to establish a TCP connection to the target ports on a target host. So, let’s import it.

Also, just to make our output look pretty, we will display the open ports in green and closed ports in red. For that, we will import termcolor module.
Code
Next, we need to create a socket instance.

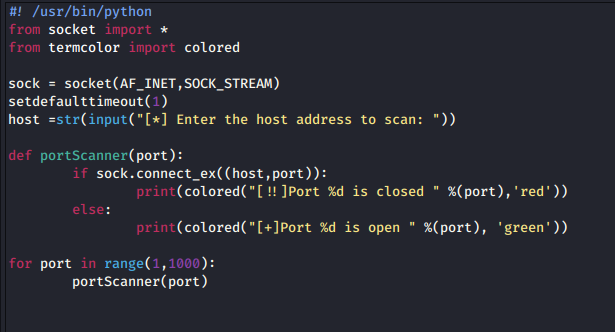
In the first line, we create the socket instance. The first parameter AF_INET refers to the address family of IPv4 addresses. We are using this because the input to our scanner will be the IPv4 Address that our program will scan. SOCK_STREAM, the second parameter, because we’re creating a TCP socket and will be using the TCP protocol for connection.
The setdefaulttimeout() function takes the number of seconds as a parameter. In our case, we will set the default timeout for new sockets to 1 second.
In the third line, we take the target's IPv4 address as input from user and save it in the host variable. We will use this variable to connect to the host later.
Now, we will set up a for loop to iterate through the number of ports in a particular range.

We will scan the first 1000 ports. You can change the range if you want to. We will pass the port number in every iteration to the portScanner() function. But we haven't coded our portScanner() function yet, so let's do that now.
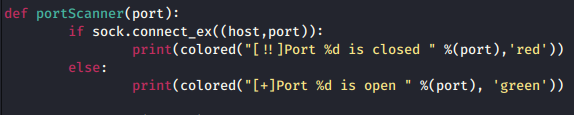
The portScanner() function is a simple if else conditional loop. The connect_ex() function will try to establish a connection to the host given by the user and at the port passed by the for loop's current iteration.
You can use connect() instead of connect_ex() as well, but you have to remember to surround it by try-except. On the other hand, connect_ex() returns a 1 or 0 indicating success or failure of the operation.
If we manage to connect to the target port successfully, we will simply print out the port number and a message that the port is open. Else, we will print the said port is closed.
Let’s have a look at the complete code now.
Time to Test
Now, it is time to check if our code works. To test the code, close your editor and run the code using python3 command.
The command for running the code is:
python3 filename.py
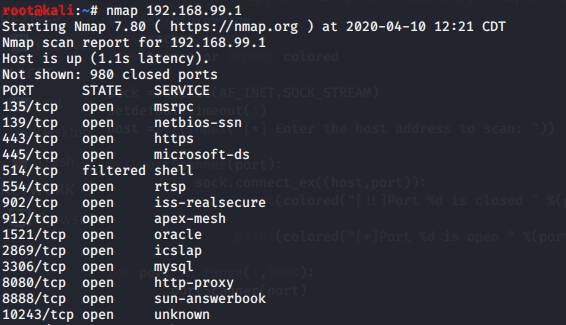
Enter the host IP address you want to scan. I’m going to enter the IP of my Windows 7 virtual machine.
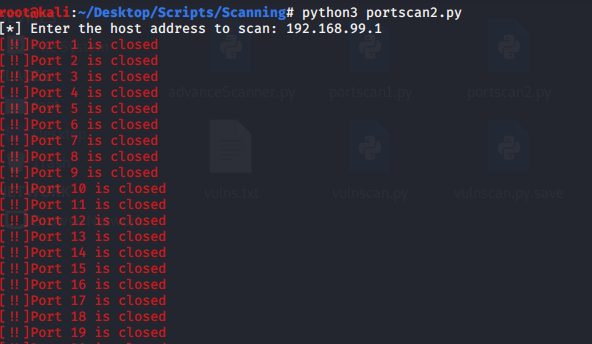
The scan will continue for some time. Once it reaches an open port, it will print it out in green.
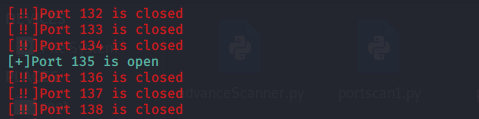
To speed up the scan and have a clear terminal, you can comment the print statement for closed ports.
And with that, we have completed our Simple Port Scanner in Python.
What next?
You can modify this simple port scanner to make it more user friendly. For example, our simple scanner only scans IP Addresses as of now. We can write a function that translates domain names to addresses. Next, instead of scanning for 1000 ports, we can ask the user to input the ports or port range he wants to scan.
For any questions, feel free to reach out on Twitter or Instagram
Until next time.